1. Web terminal
Using OpenShift’s web terminal might be more convenient for you as it doesn’t require you to install oc locally on your computer.
Note
If you do change your mind, head right over to 2. Local usage.Task 1.1: Login on the web console
First of all, open your browser. Then, log in on OpenShift’s web console using the URL and credentials provided by your trainer.
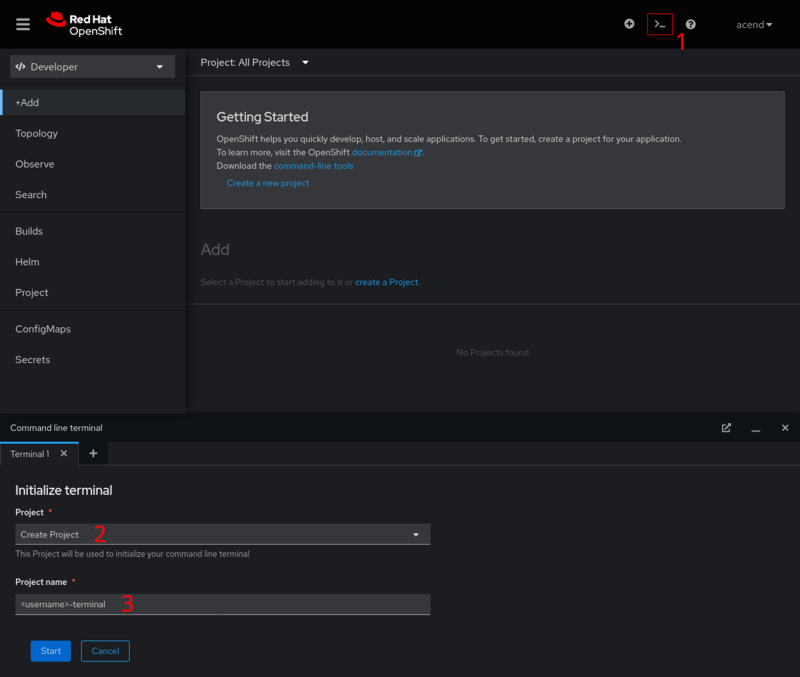
Task 1.2: Initialize terminal
Warning
Make sure to create a dedicated project for the web terminal!In OpenShift’s web console:
- Click on the terminal icon on the upper right
- Choose to create a new project
- Name your project
<username>-terminalwhere<username>is the username given to you during this training - Click Start
Task 1.3: Verification
After the initial setup, you’re presented with a web terminal.
Tools like oc are already installed and you’re also already logged in.
You can check this by executing the following command:
oc whoami
You’re now ready to go!
Warning
The terminal project is only meant to be used for the web terminal resources. Always check that you do not use the terminal namespace for the other labs!Next steps
If you’re interested, have a look at the 3. Other ways to work with OpenShift, which is however totally optional.
When you’re ready to go, head on over to the labs and begin with the training!