3. Deploying a container image
In this lab, we are going to deploy our first container image and look at the concepts of Pods, Services, and Deployments.
Task 3.1: Start and stop a single Pod
After we’ve familiarized ourselves with the platform, we are going to have a look at deploying a pre-built container image from Quay.io or any other public container registry.
In OpenShift we have used the <project> identifier to select the correct project. Please use the same identifier in the context <namespace> to do the same for all upcoming labs. Ask your trainer if you want more information on that.
First, we are going to directly start a new Pod. For this we have to define our Kubernetes Pod resource definition. Create a new file pod_awesome-app.yaml with the content below.
Note
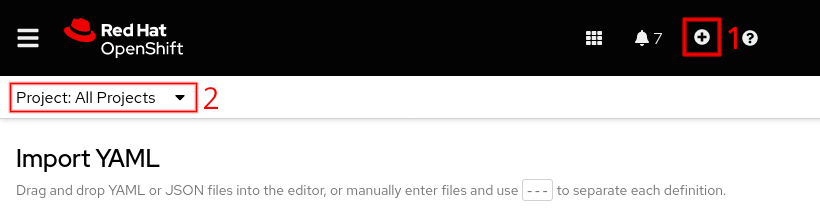
Alternatively, you can create the Pod definition on the web console. Simply click on the plus sign button on the upper right (1), make sure you’ve selected the correct Project (2) and paste the content.
apiVersion: v1
kind: Pod
metadata:
  name: awesome-app
spec:
  containers:
  - image: quay.io/acend/example-web-go:latest
    imagePullPolicy: Always
    name: awesome-app
    resources:
      limits:
        cpu: 20m
        memory: 32Mi
      requests:
        cpu: 10m
        memory: 16Mi
Note
If you used the web console to import the Pod’s YAML definition, don’t execute the following command.
Now we can apply this with:
oc apply -f pod_awesome-app.yaml --namespace <namespace>
The output should be:
pod/awesome-app created
Use oc get pods --namespace <namespace> in order to show the running Pod:
oc get pods --namespace <namespace>
Which gives you an output similar to this:
NAME          READY   STATUS    RESTARTS   AGE
awesome-app   1/1     Running   0          1m24s
Have a look at your awesome-app Pod inside the OpenShift web console.
Now delete the newly created Pod:
oc delete pod awesome-app --namespace <namespace>
Task 3.2: Create a Deployment
In some use cases it can make sense to start a single Pod. But this has its downsides and is not really a common practice. Let’s look at another concept which is tightly coupled with the Pod: the so-called Deployment. A Deployment ensures that a Pod is monitored and checks that the number of running Pods corresponds to the number of requested Pods.
To create a new Deployment we first define our Deployment in a new file deployment_example-web-go.yaml with the content below.
Note
You could, of course, again import the YAML on the web console as described above.
apiVersion: apps/v1
kind: Deployment
metadata:
  labels:
    app: example-web-go
  name: example-web-go
spec:
  replicas: 1
  selector:
    matchLabels:
      app: example-web-go
  template:
    metadata:
      labels:
        app: example-web-go
    spec:
      containers:
        - image: quay.io/acend/example-web-go:latest
          name: example-web-go
          resources:
            requests:
              cpu: 10m
              memory: 16Mi
            limits:
              cpu: 20m
              memory: 32Mi
And with this we create our Deployment inside our already created namespace:
Note
If you used the web console to import the Deployment’s YAML definition, don’t execute the following command.
oc apply -f deployment_example-web-go.yaml --namespace <namespace>
The output should be:
deployment.apps/example-web-go created
We’re using a simple sample application written in Go, which you can find built as an image on Quay.io or as source code on GitHub .
OpenShift creates the defined and necessary resources, pulls the container image (in this case from Quay.io) and deploys the Pod.
Use the command oc get with the -w parameter in order to get the requested resources and afterward watch for changes.
Note
Theoc get -w command will never end unless you terminate it with CTRL-c.oc get pods -w --namespace <namespace>
Note
Instead of using the -w parameter you can also use the watch command which should be available on most Linux distributions:
watch oc get pods --namespace <namespace>
This process can last for some time depending on your internet connection and if the image is already available locally.
Note
If you want to create your own container images and use them with OpenShift, you definitely should have a look at these best practices and apply them. This image creation guide may be for OpenShift, however it also applies to Kubernetes and other container platforms.Creating Kubernetes resources
There are two fundamentally different ways to create Kubernetes resources.
You’ve already seen one way: Writing the resource’s definition in YAML (or JSON) and then applying it on the cluster using oc apply.
The other variant is to use helper commands. These are more straightforward: You don’t have to copy a YAML definition from somewhere else and then adapt it. However, the result is the same. The helper commands just simplify the process of creating the YAML definitions.
As an example, let’s look at creating above deployment, this time using a helper command instead. If you already created the Deployment using above YAML definition, you don’t have to execute this command:
oc create deployment example-web-go --image=quay.io/acend/example-web-go:latest --namespace <namespace>
It’s important to know that these helper commands exist. However, in a world where GitOps concepts have an ever-increasing presence, the idea is not to constantly create these resources with helper commands. Instead, we save the resources’ YAML definitions in a Git repository and leave the creation and management of those resources to a tool.
Task 3.3: Viewing the created resources
Display the created Deployment using the following command:
oc get deployments --namespace <namespace>
A Deployment defines the following facts:
- Update strategy: How application updates should be executed and how the Pods are exchanged
- Containers
- Which image should be deployed
- Environment configuration for Pods
- ImagePullPolicy
- The number of Pods/Replicas that should be deployed
By using the -o (or --output) parameter we get a lot more information about the deployment itself. You can choose between YAML and JSON formatting by indicating -o yaml or -o json. In this training we are going to use YAML, but please feel free to replace yaml with json if you prefer.
oc get deployment example-web-go -o yaml --namespace <namespace>
After the image has been pulled, OpenShift deploys a Pod according to the Deployment:
oc get pods --namespace <namespace>
which gives you an output similar to this:
NAME                              READY   STATUS    RESTARTS   AGE
example-web-go-69b658f647-xnm94   1/1     Running   0          39s
The Deployment defines that one replica should be deployed — which is running as we can see in the output. This Pod is not yet reachable from outside the cluster.
Task 3.4: Verify the Deployment in the OpenShift web console
Try to display the logs from the example application in the OpenShift web console.
Task 3.5: Build the image yourself
Up until now, we’ve used pre-built images from Quay.io. OpenShift offers the ability to build images on the cluster itself using different strategies :
- Docker build strategy
- Source-to-image build strategy
- Custom build strategy
- Pipeline build strategy
We are going to use the Docker build strategy. It expects:
[…] a repository with a Dockerfile and all required artifacts in it to produce a runnable image.
All of these requirements are already fulfilled in the source code repository on GitHub , so let’s build the image!
Note
Have a look at OpenShift’s documentation to learn more about the other available build strategies.
First we clean up the already existing Deployment:
oc delete deployment example-web-go --namespace <namespace>
We are now ready to create the build and deployment, all in one command:
oc new-app --name example-web-go --labels app=example-web-go --context-dir go/ --strategy docker https://github.com/acend/awesome-apps.git --namespace <namespace>
Let’s watch the image’s build process:
oc logs bc/example-web-go --follow --namespace <namespace>
The message Push successful signifies the image’s successful build and push to OpenShift’s internal image.
In the above command you discovered a new resource type bc which is the abbreviation for BuildConfig.
A BuildConfig defines how a container image has to be built.
A Build resource represents the build process itself based upon the BuildConfig’s definition.
A build takes place in a Pod on OpenShift, so instead of referencing the BuildConfig in our oc logs command, we could have used the build Pod’s log output.
However, referencing the BuildConfig has the advantage that it can be reused each time a build is run.
A build Pod changes its name with every build.
Have a look at the new Deployment created by the oc new-app command:
oc get deployment example-web-go -o yaml --namespace <namespace>
It looks the same as before with the only essential exception that it uses the image we just built instead of the pre-built image from Quay.io:
    ...
    spec:
      containers:
      - image: image-registry.openshift-image-registry.svc:5000/<namespace>/awesome-app@sha256:4cd671273a837453464f7264afe845b299297ebe032f940fd005cf9c40d1e76c
      ...